Multiple email accounts, task lists, and calendars are just a few of the tools that Outlook makes easy to manage. You should set Outlook to remember your password to save time and eliminate the need to enter your password every time you open an application, depending on how frequently you use it.
This is especially beneficial if you have many Outlook accounts, Having several corporate accounts as well as one personal account. You can choose whether or not to automatically sign in to any Outlook email account if you choose.
How Can I Make Outlook Remember My Email Password?
Step 1: To get started, open Outlook and go to the File tab.
Step 2: Select the Account Settings option from the drop-down menu below after clicking the Account Settings button.
Step 3: Choose the email account you'd want to create. This is only required if you use Outlook with several accounts. Otherwise, only the accounts that are currently active will be displayed.
Step 4: Above the list of accounts, click the Change button.
Step 5: Select the Remember password check box to enable this feature.
Step 6: In the Password text field, type your password.
Step 7: After that, select Next, then Finish.
Tips to Use Outlook
1. Organize Your Emails into Folders
This is an apparent first step if you wish to streamline your email usage. It can, however, be the most challenging, particularly if your email is clogged. Organizing your email in a sensible and easy-to-navigate folder system is still the best option. You don't have to sift through thousands of emails to find what you're looking for.
Furthermore, the simple folder system allows you to process all received emails immediately rather than delaying them to a later date.
2. Save Important Emails
This not only organizes your inbox but also allows you to access key news and events more quickly. Click File> Save As if you can save an email, calendar item, or other note to your desktop or folder, or save it in a specific file format. Just double on it to access it, and Outlook will open immediately.
3. Take Advantage of Outlook’s Easy Email Templates
If you find yourself writing the same message over and over again, save one of your emails as a template for future use. When you're ready to use this pre-saved form, navigate to File> Save As...> Outlook Templates, then Item> Select Form... > User Templates.
4. Schedule Delivery of An Email
Do you want to compose your message now or send it later? Outlook makes it simple. After you've finished writing the email, go to Options> Delayed Delivery> Never Delivered Previously and set the day and hour for it to be sent.
It's ideal for getting a quick response before flying or attending an evening meeting.
5. Embrace Outlook’s Web-Based Future
Much of your email, calendar, and contact infrastructure is moved to a web-based view accessible from any device with Outlook 2013, Office 365, and other recent versions of the application. Microsoft's Communicate Email tool for cellphones can also be used to send letters between coworkers.
All communications are also saved in Microsoft Outlook history for simple archiving and retrieval.
6. Block Emails from Specific Senders
Although true anti-spam protection is best offered by a reputable IT specialist, there are some steps you may do to prevent unsolicited emails. To open a new window where you may identify the sender (and country) you want to blacklist as spam, go to Home> Junk E-mail Options.
7. Learn Your Keyboard Shortcuts
This is a great strategy exercise, but it saves you a lot of time thanks to your keyboard shortcut knowledge. Ctrl + R (Reply Email), Alt + R (Reply All), Alt + W (Forward Email), Alt + S (Send Email), and Ctrl + G (Go to Each) are some of our favorites.)
8. Rely on Sticky Notes for Quick Reminders
To make a new note, press Ctrl + Shift + N anywhere in the Outlook UI and drag it to any location on the screen. This is useful for quick chores that do not require manual entry into your calendar.
9. Adjust Desktop Notifications
If you get a notification every time a message comes into your inbox, you can become distracted. But, because I don't want to miss critical emails, I've created a custom rule that disables desktop notifications in File> Options> Email Options and only displays notifications for messages sent by particular contacts.
Conclusion
Microsoft Outlook is currently one of the greatest email service providers on the market. You may send and receive emails from friends, family, and business associates using your Outlook account. You must protect your Outlook account with a strong password in order to preserve its security.
However, if you forget your Outlook password, you'll have trouble accessing your account because you won't be able to access it without it. Before you can access your Outlook emails again, you'll need to retrieve your Outlook password in some way.
Read
More
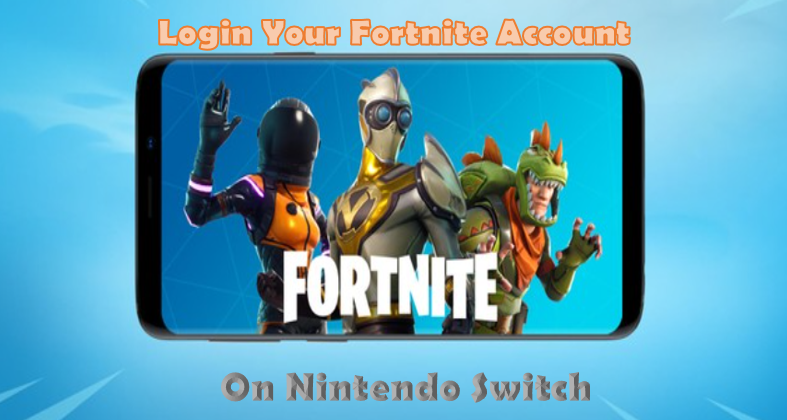
Everyone has played Fortnite, so it is one of the reasons for its cross-program capabilities. You can enjoy on a Nintendo Switch, and you're on the resource of an Xbox. Even you are more capable of playing the game together. Fortnite permits you to connect all your profiles; therefore, you can enjoy the same account across all competitions.
This method is too easy, and I believe that you may grow up your battle pass anyway of the display you are playing. Therefore, you will understand immediately how to sign in to your Epic account and aware of your credentials on entire relevant platforms; connecting your account will take time less than five minutes.
Login Using Sources
If you have the only computer, iOS, Mac, or Android devices, you don't feel panic about connecting to other accounts. Even with some legal issues between Epic platforms and iOS, Apple users cannot play Fortnite on their device for a long time. We hope the game will come back immediately.
If you logged in, you have to go to your account page and see the tab on the left that shows a connected account. You will then observe to connect account for GitHub, Twitch, Xbox, PlayStation Network, and Nintendo Switch. This process near-identical all three services entirely. You must have to login in every turn using the same ID and password.
You feel on each comfort, and then you allow to provide your user information with Epic Games. You can take your Fortnight account on the Nintendo Switch version of Fortnite and not like to care about losing approach to any development or purchases on the switch version.
Sign in to Epic Platform with Your Nintendo ID and Unlike the Switch
The most valuable thing to know about this method is that it does not replace the Nintendo switch by itself. In reality, you didn't have proper login access to your PSN account on the switch version of Fortune. Because Nintendo does not favor signing out of a switch, connect Epic account from the Fortune client itself. If you have logged in once, the performance is trusted from the point of view of Nintendo.
If you do not mind playing Fortnite on Switch and never creating a Nintendo- centric account in the priority, you can be a better option. If you create an Epic account linked to your Nintendo Switch, go to the Epic Games website and sign in to your Nintendo Account. Here you can click the account option that declined in your user ID regarding the connected account and click on the disconnect option under the switch icon.
You have to follow through with bringing our, which indicates how this method will not open games, which is expired at this point due to a change of policy change.
Log in to Epic Games
Currently, if you're a PS4 Fortnite player, you have an Epic account made by signing in on the comfort itself. Marking into a similar Fortnite website and making a beeline for a connected account will give you a rundown of stages, which currently incorporates an appropriately working Switch choice. Clicking "Interface" will let you sign in with your Nintendo Account, and that is it. You're connected and all set.
Fire Up Fortnite Automatically Log in
Head over to Fortnite on the Switch and dispatch it utilizing the profile on your gadget connected to your Nintendo Account, precisely the same account you just connected to PSN through Epic's website. You'll need to consent to a EULA; however, it will naturally get you through the login cycle. From that point onward, you'll see your record, completely secure, and with all its brilliant skins and Battle Pass progress unblemished on your Nintendo Switch.
To Connect Your Epic Account to Switch
Connecting your epic account to switch will be too fundamental or somewhat muddled, relying upon one factor: regardless of whether you have an Epic Account. When playing Fortnite on a stage unexpectedly, you don't need to set up an Epic Account. It will merely attach your advancement to your PSN ID or Nintendo Account. It isn't an issue until you need to convey your improvement over to an alternate stage.
Entangling this issue further is the way that you couldn't already associate an Epic Account to Nintendo Switch if you'd recently marked onto PS4 with it – or the other way around. This limitation was then lifted.
Since the set of experiences exercise is far removed, how about we experience the means you have to take to tie your Nintendo Switch progress to an Epic Account before you can connect it to PS4. If you realize you have an Epic Account with your Switch progress attached to it. You will get an easy way of learning how to login into Fortnite because it is important for you to log in to it.
Read
More
Are you finding some issues while login into your Kahoot account? Is your Kahoot app is not working on your chrome? If there is occurring an error while signing into your Kahoot account, you can work properly. These issues may occur due to internet issues or incorrect personal information required to log in.
In this article, we will discuss solutions to fix Kahoot Login issues in the right way,
What is Kahoot Account?
Kahoot is an online game-based learning platform that lets people create an account and learn through playing games. This application works on both desktop and android devices to enjoy online game-based learning. Kahoot creates a classroom situation for students and lets them answer quizzes to learn activities interestingly.
You can create an account on Kahoot by directly signing in or signing in with your Google account.
Kahoot is Not Working on Chrome
Are you finding an issue while opening your account on Chrome? There may be some error in your browser while logging in to your Kahoot Account. Due to this issue, you cannot sign into your account and work properly on Kahoot.
Sometimes the web browser chrome does not work with Kahoot and shows an error. You can install another internet browser on your android device or desktop to log in to your Kahoot account if Kahoot is not working on Chrome.
Fix Kahoot Login Issues
If your Kahoot application is not working properly on your android device or desktop, it means some issues do not let you sign in to your Kahoot account. Let us discuss these issues and how to fix Kahoot Login Issues:
Kahoot Blank Screen Issues
Sometimes when you try to open your Kahoot application on your android, a blank screen appears and you cannot proceed with the login process. The application shows an error and is unable to start the login process.
This is a temporary issue and may solve after some second. But you are finding this issue permanently and are not able to open the application properly; you need to Fix this Kahoot Login issue.
Solutions to Solve this Issue
Close the Kahoot application and start the application again to fix the Kahoot login issue and sign in to your account.
Restart the Android device and open the application again for proper functioning.
Check the battery power of your android device and fix the battery issue by charging your android device.
If you have tried all solutions and your application is not working, you need to install the Kahoot application again to Fix the blank screen and Kahoot login issue.
Kahoot Login Issues
Are you unable to sign in to your Kahoot application? Sometimes your Kahoot application works properly but you are unable; login into your Kahoot account. Check out for other solutions to fix Kahoot login issues:
Simple Steps to Fix Kahoot Login Issues
1. Kahoot Server is Going Busy
Sometimes, the Kahoot server is busy and does not respond to your login process. You can try after some time to fix this Kahoot login issue. Close the application and start it again to proceed with the login process.
2. Check for Internet and Wi-Fi connection
Another issue that does not let you sign in to your Kahoot account is that your internet connection is off. Check for internet connection and make your mobile data or Wi-Fi connection is working properly.
If your internet connection is off, you cannot connect to the Kahoot server for the sign-in process.
3. Enter the correct Login Credentials
To sign in to your Kahoot account, you enter your username and password. If you have created a Kahoot account with a Google account, you enter your email address and password. Put the right credentials to log in to your Kahoot account.
If you put the wrong username or password, the Kahoot server will show an error, and you cannot sign in to your Kahoot account. Remember your username and password to login into your Kahoot account.
4. Reset Your Kahoot Password
If your internet connection is stable and you still find the Kahoot login issue. Check the password you are providing is correct. If you provide an incorrect password, you cannot sign in to your Kahoot account. you can reset your Kahoot account password by going to the “Forget password” option. Get a new password for your Kahoot account to fix the Kahoot login issue due to the wrong password.
5. Check for Your Linking Accounts
You must check for your other accounts if there is occurring an error while logging in to your Kahoot account. Check your Facebook, Twitter, Google, and Microsoft account are working properly.
Conclusion
Kahoot account lets you learn online game-based activities by creating an account and logging in to your account. You cannot sign in to your account. You can fix the Kahoot login issues by resetting your password.
Read
More
Most of us have provided data to companies at some point or another. We may have shared our contact information when signing up for a newsletter, or we may have handed over our driver’s license number to get a discount at the store. And chances are, we never gave it a second thought. But what happens to all that data once it’s been collected?
There is a way to find this out by making a DSAR. What is a DSAR? You'll find out here!
What Is a DSAR?
A DSAR is a formal request for information that a company holds about an individual. It stands for "data subject access request."
People make DSARs for a variety of reasons. Sometimes they want to see what data a company has collected about them. Other times they want to correct inaccurate data. And sometimes people make DSARs to find out who has been given access to their data.
Making a DSAR is a way to exercise your rights under the General Data Protection Regulation (GDPR). The GDPR is a new EU data protection law that came into effect in May 2018. It gives individuals more control over their personal data.
The GDPR requires companies to respond to DSARs within one month. Companies can extend this deadline by two more months if the request is particularly complex.
What Are the Benefits of Making a DSAR?
Making a DSAR can help you to:
-Find out what data a company holds about you
-Correct inaccurate data
-Understand why a company has your data
-Find out who has accessed your data
Making a DSAR is also a good way to hold companies accountable for their handling of your personal data. It can help you to identify any data protection problems and fix them.
What Are the Steps for Making a DSAR?
The first step is to identify the company that you want to make the request to. You will need to contact the company and ask them for their DSAR process.
The second step is to fill out the DSAR form. This form will ask you for your personal information, as well as what information you want to request.
The third step is to submit the form to the company. You can do this by mail, email, or in person.
The fourth step is to wait for the company's response. The company has one month to respond to your request. They can extend this deadline by two more months if the request is particularly complex.
The fifth step is to review the company's response. If you are not satisfied with the response, you can contact the company's data protection authority.
Who Can Make a DSAR and How Do They Go About it?
Anyone can make a DSAR. You do not need to be a citizen of the EU or have any specific legal status.
You can make a DSAR by contacting the company that you want to make the request to and asking them for their DSAR process.
What Kind of Information Can Be Included In a DSAR Request Form?
The DSAR request form should include your:
-Name
-Address
-Contact information
-Description of the personal data you want to request
You can also include a description of the reason for your request. For example, you might want to request data that the company holds about you so that you can correct inaccurate information.
How Long Will It Take for My Request to be Processed Once I've Submitted It?
The company has one month to respond to your request. They can extend this deadline by two more months if the request is particularly complex. Companies that do not respond to DSARs can be fined up to 4% of their annual global revenue or €20 million (whichever is greater).
What if I’m Not Satisfied With the Company's Response to My DSAR?
If you are not satisfied with the company's response to your DSAR, you can contact the company's data protection authority.
You can also file a complaint with the supervisory authority if you believe that the company has not handled your DSAR correctly.
Are There Any Restrictions on Who Can Submit a DSAR?
There are no restrictions on who can submit a DSAR. You do not need to be a citizen of the EU or have any specific legal status. Anyone can make a DSAR by contacting the company that they want to make the request to and asking them for their DSAR process.
Conclusion
Making a DSAR is a great way to get a better understanding of how a company is using your personal data. It can help you to correct inaccurate data, understand why a company has your data, and find out who has accessed your data. If you are not satisfied with the company's response to your DSAR, you can contact the company's data protection authority.
Read more:
Tips to Getting Your Account Credentials Back Easily
5 Minutes to Create a Gmail Account
Read
More